Showing posts with label Recipes. Show all posts

Friday, August 22, 2014

{recipe} white chicken enchiladas with salsa verde


YOU GUYS.
I have been dreaming about these enchiladas for a long time now. 

I've never been a huge fan of the standard enchilada sauce. You know, that red, tomato-based one? I don't know. It just never sat well with me. However, things doused in sauce have a special place in my heart. Loaded hot dogs, chili cheese fries, wet burritos - you name it. So of course I had to seek out a good enchilada recipe. Thank God for Pioneer Woman and Guy + Rachel Ray's video. I got the inspiration I needed to whip up a pretty amazing chicken enchilada recipe. It has a white creamy sauce for base and it's layered with some salsa verde for some extra pop! 

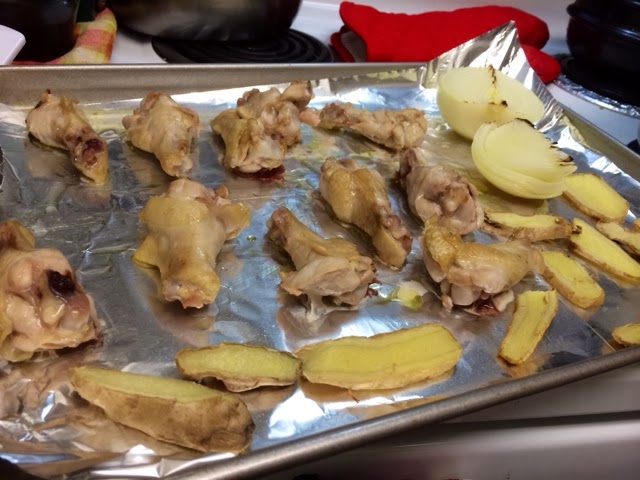
You start with some chicken. I love/prefer dark meat any day. Thighs are my fave. 


Brown with some EVOO, s+p. You don't have to cook it all the way. Actually - I'd say, don't cook it all the way! You'll be heating it up so let it stay a little pink to prevent from overcooking/drying the chicken meat. 

These babies are the key to this recipe. Green chilis. I prefer canned. I also prefer fire-roasted. But that's just my humble opinion. : ) 


In the same pan, saute some onions in the remaining chicken juice. Add the green chili. Add the chicken. Sprinkle on some paprika. Watch the magic happen all by itself. It's a beautiful thing. Add a little bit of chicken broth to moisten up the mix.


Now - make your sauce. In a seperate pan, melt some butter. Sprinkle flour. Whisk it together to make your roux (does that make me sound fancy? I looked it up on wiki. hehe). Roux will basically act as your thickening agent.  Add your broth. Add some more chilis (I told you...key ingredient!) then add your sour cream. I know that looks like a lot - but it was only 1 cup! 

I found a recipe to make healthy "sour cream" substitute for next time : )
cottage cheese + lemon juice - genius!

After some heatin' and mixin' - it becomes this beautiful, creamy, rich sauce. Then you add some cheese to buff it up and make it even more magical. 


I had to rush around this time, so no pictures... but, basically you just heat up some tortillas (I used flour), roll your chicken mix and cheese into each tortilla. Lay em down on a bed of salsa verde. Pour the sauce on top. Sprinkle some cheese. Bake for 30 minutes. 

Top with tomatoes, cilantro and olives (I forgot mine!) You can even add some lime juice. Or throw in some chopped green onions. Go crazy. Be free! 


And most importantly - serve with some hot sauce. I served mine with a simple corn salsa and made a second batch for good measure.  We have leftovers and we're really happy about it. 


Can't wait to make these again. 
Have a good weekend, sweet friends!

xoxo

White Chicken Enchiladas with Salsa Verde
Recipe Adapted from The Pioneer Woman
Serves 4

for the filling 
  • 6 bone-less chicken thighs 
  • 1/2 cup chicken broth
  • 3 tbsp EVOO
  • 10 flour tortillas (I used large)
  • 1 whole large onion, diced
  • 3- 4oz cans green chili peppers (I used fire-roasted)
  • 1/2 tsp paprika 

sauce
  • 2 tbsp butter
  • 2 tbsp flour
  • 1 cup sour cream (or use the healthy "sour cream" substitute)
  • 1 1/2 cups of chicken broth
  • 2 Monterey Jack Cheese, Grated
  •  Salt And Pepper, to taste
  • 1/2 tsp paprika 
  • salt and pepper to taste

for the topping and base
  • 1 tomato, diced 
  • 1/2 bunch cilantro, roughly chopped
  • any hot sauce (i.e. tapatio)
  • 2 cups salsa verde 
Heat 2 tablespoons EVOO in a skillet over medium-high heat. Brown chicken on pan - add salt and generous portion of freshly grated black pepper. Remove chicken from pan and cut into bite-sized pieces. Add onions and saute into the same pan for 1 minute. Add green chilies, green chili and 1/2 teaspoon paprika. Stir together. Add 1/2 cup chicken broth and stir. Heat over med-high and allow mixture to bubble and get hot. Turn off heat and set aside.
In a separate large skillet, melt butter and sprinkle in flour. Whisk together and cook over medium heat for one minute. Pour in 1 1/2 cups chicken broth. Whisk together and cook for another minute or two until mixture begins to thicken. Stir in green chilies. Reduce heat, then stir in sour cream. Add 1 1/2 cups grated cheese and stir to melt. Add 1/2 teaspoon paprika. Check seasoning and add salt and pepper as needed.
To assemble, spoon chicken mixture on top of tortillas, one by one. Top with plenty of cheese and roll up. Lay a layer of salsa verde on casserole dish. Place seam side down in a casserole dish, side by side. 
Pour creamy cheese sauce mixture all over the top of the tortillas. Add a little bit of salsa verde on top if you'd like! Top with extra shredded cheese, then bake at 350 degrees for 30 minutes. Sprinkle generously with chopped cilantro and tomatoes.
Serve with hot sauce, if desired.


Monday, August 18, 2014

{Recipe} Miso Ramen with Chashu Pork

One of Eugene's favorite foods ever is RAMEN. Japanese ramen to be specific. 

That's one of his biggest comfort foods.
We eat it most frequently when he's busy with school or right before his exams. We ate a lot of ramen during his first year of pharmacy school when he was adjusting to busy grad school life.

Being the wife of an avid ramen lover, I had to at the very least attempt to make ramen at home. For the past week or so, I've read a bunch of articles and watched lots of youtube videos to try to prepare for this day. I love making our favorite dishes at home because you can personalize it to your liking and have fun/be creative with it. Eugene actually requested that I make tonkotsu ramen  but when I found out that it actually takes 2-3 days to make (because of the grueling broth-making process), I asked Eugene if I try a more simple recipe first. Obviously he gave me the green light, and today I attempted to make my first home-made ramen.

I chose Miso Ramen because it's known to be one of the more simple recipes. The broth doesn't take as long, and I had a tub of un-used miso in my fridge. 

The hardest part was preparing the chashu. I wanted to try to be super fancy and make it "restaurant style" and I learned that the way to do this is to roll the pork and tie it with butchers twine. This shape, opposed to merely cooking it flat, is known to help trap moisture and flavor. It also makes it look super fancy. 

I didn't have twine so I used a roll of 100% cotton sewing thread that I had - which the websites say is a decent substitute. The downside was that it didn't hold as well as twine probably would - so next time, I'm definitely getting my twine!


They say to leave the skin on. And marinade it in this delicious little pot of goodies. Mine had soy sauce, mirin, white wine (in place of sake), sugar, ginger, green onions and lots of garlic. Most recipes will call for you to throw this in the oven for 3-4 hours after it comes to a boil. I initially did that - and then 2 hours later got impatient. Also, my small little apartment got SO STINKIN' HOT from the oven being on, so of course I had to transfer it to my handy dandy dutch oven. 


Within 30 minutes, this happened. 
The key to making soft, tender and juicy chashu is to cook it for a long time in low(er) heat. Cooking it on too high of a heat will cause the pork to dry. Unfortunately, this was the mistake that I made but I definitely know for next time. I cooked it in my dutch oven for another hour under low heat, with the lid ajar to prevent it from steaming. 


I flipped the meat every 15-20 minutes so that it would brown evenly. Near the end, when most of the marinade begins to reduce - you have to watch closely to prevent burning! It happens FAST. (Look at all those yummy garlic and ginger pieces!)


Preparing the egg was also pretty challenging. 


You boil first, then let it marinade in the same concoction you used for the chashu. First, poke a hole with a tack on the fat end of an unboiled egg. Throw it in boiling water for six minutes only. (I was so afraid of over-cooking the eggs, I might have taken them out too soon!)

After you boiled your eggs for 6 minutes, they should be "soft boiled". Wash them in cold water and peel off their shells. Marinade with some of the chashu marinade. 

Once the pork is cooked through - put the pork in an airtight container and cool it down in the fridge.) It will be easier to cut once they've cooled. 


Make your broth. I used 1:1 chicken broth and water. I added some dashi and lots of minced garlic and ginger. I let it boil like crazy. 


I strained the small garlic + ginger bits out. You could leave em in. No one will get mad at ya! If I had an immersion blender, I'd probably blend all these little goodies into the broth. One day... : ) 

Add some soy sauce! 


Then finally, your miso! 


Mash it in over a strainer to prevent the large chunks for getting lost in the mix, 


Arrange your toppings. I love filling mine with veggies. Eugene requested extra chashu in his. We both got what we wanted and we were both happy people. : )


We added a little bit of hot sauce and ate it with some cali rolls. It was perfect!


Hopefully I'll perfect the chashu and eggs next time!

Tonkotsu is next. : )

xoxo


Miso Ramen with Chashu Pork

Recipe Adapted from The Steamy Kitchen  & Serious Eats 
Feeds 3-4

Ingredients
4 eggs for the Ajitsuke Tamago
2 lb pork belly for Chashu Pork
marinade
1/2 cup soy sauce
1 cup mirin
1 cup sake (I used white wine)
1/2 cup sugar
6 stalks of green onion
2-inch piece of ginger, peeled and chopped
1 onion, chopped
6-8 cloves of garlic 
10 oz (285 g) dried ramen noodles
for topping
1/2 cup (200 g) fresh or canned bamboo shoots, sliced
1/2 cup (170 g) fresh or canned corn kernels, drained1 cup (80 g) defrosted frozen or fresh spinach
1/2 small cabbage, chopped
2 cup bean sprouts
broth
6 cups broth (preferably vegetable or pork, I used chicken)
1-inch ginger, peeled and minced
5 cloves garlic.
2 teaspoons instant dashi granules1 tablespoon soy sauce, or to taste4 tablespoons fresh miso paste
for the finishing touch
1 stalk green onion (scallions), finely chopped
4 teaspoons chili oil (optional)

Instructions
1. Prepare eggs (using this recipe for Ajitsuke Tamago) and pork belly (using recipe for  Chashu Pork).
2. Prepare broth by bringing it to a boil. (I used 1:1 of chicken broth + water because that's all I had. I used water because chicken broth is usually on the heavier side.) Add minced garlic and ginger until it comes to a boil. Add dashi. Remove excess garlic and ginger bits, or use immersion blender and blend into broth. Add soysauce. Begin mixing miso paste into broth over a fine mesh strainer to prevent large chunks from getting into the broth. Bring to boil for another 10-15 minutes. Add more miso paste to taste.
3. Place noodles in boiling water until al dente. Set aside in separate bowls for serving. 
4. Arrange toppings per each person's preference. Pour broth over noodles and toppings. Top with fresh chopped green onions and chili oil/paste (optional). Serve immediately.


Tuesday, August 12, 2014

{Recipe} Santa Fe Zucchini Boats

It's almost been three months since my last recipe post! It's time to get back on it. :) 

I love "Santa Fe" styled things. 
To be honest, I don't really know what makes something Santa Fe. All I know is that this beautiful combination of "Santa Fe" things include corn, beans, tomatoes, cheese and tortilla chips. (of course, it immediately becomes 100x better when avocado is thrown into the mix.)  Eugene and I came back from a cruise last week - and if you've ever been on a cruise, you know that there is a disgusting yet amazing amount of food. We ate so well and came back round and brown. Since then, we've been trying to "detox" and eat healthier. I've been looking for a lot of new healthy recipes to include into our recipe archive and I saw a good amount of zucchini boats. We're planning to do a carb-less meal a day and this makes for an amazing distraction from my usual craving for white rice, noodles and potatoes! 


This recipe is so quick and easy - I kind of want to make it every day! 
It's also great as a leftover and I'm sure it wouldn't be a bad idea to freeze a few of these babies for a rainy day. :) So let's get started!

Start with the basics. I would start with the garlic and onions first and allow some time for it to sauté. Then season your meat and brown it until your kitchen is filled with amazing smells.


Cut your zucchini and cut out the flesh. Does that sound violent? (I hate the word "flesh")
Chop up the zucchini flesh (eek!) into bite sized pieces and toss it in the pan. It's a good filler - healthy and juicy, too! 


Get ready to santa-fe your life with these essentials.


Toss em all together and add some cumin. This brings in an amazing chili flavor to your filling. Just a little goes a long way!


After your all done cooking, add in some freshly chopped cilantro. I usually wait to do this til the end since I'm not a huge fan of browned/cooked cilantro. 


Coat your zucchini with a fair amount of EVOO or coconut oil. Lay them down on a well-greased pan.


Add the fillers. Top with cheese. TOO EASY.


Your filling will make a good amount of juice. DON'T GO CRAZY - but feel free let some juice in the mix as this will help steam/cook your zucchini while baking. 


Throw it into the oven at 400 F for 20-30 minutes until the zucchini is fork tender. 


You can bake it on a baking pan with a foil cover if you'd like, but doing it on a cookie sheet + uncovered will allow the top to char a bit and give you that beautiful golden brown cheese crust. 


Some recipes will also instruct you to place the zucchini in a pot of boiling water for a few minutes prior to cutting the zucchini and removing the flesh. I've found that this step isn't really necessary so that cut some of the prep time. 


Eugene loved it and asked me to make it again soon!
We're gonna be having spring rolls and some cabbage wraps for dinner this week. Stay tuned. :)


Turkey Santa Fe Zucchini Boats

Recipe slightly adapted from SkinnyTaste
Serve 2-3


Ingredients


For the filling:
  • 3/4 cup of lean ground turkey
  • 1/2 can black beans, rinsed and drained
  • 1/2 can of corn, rinsed and drained. 
  • 1/2 green pepper, chopped (I used 1/2 can of fire-roasted green chili peppers from TJ)
  • 1 large diced tomato (I used 2/3 can of diced tomatoes)
  • 5 cloves garlic, minced
  • 1/2 chopped onion
  • 3 tbsp chopped cilantro
  • 1 tsp cumin
  •  kosher salt to taste

For the zucchini:

  • 2 medium zucchini, cut in half lengthwise
  • 15 tbsp shredded reduced-fat Mexican blend cheese

Halve your zucchini. Using a small spoon or melon baller, hollow out the center of the zucchini halves, leaving 1/4-inch thick shell on each half. Chop the scooped out flesh of the zucchini in small pieces and and set aside.
In a large skillet brown, saute garlic and onions in EVOO or CO. The turkey and season with salt. When the turkey is browned, add black beans, corn, peppers, diced tomatoes, reserved zucchini. Add cumin. Mix well and simmer on low, covered for 20 minutes. Remove lid and simmer an additional 5 minutes or until all the liquid reduces. Add cilantro and mix well. 

Place the hollowed out zucchini cut side up in a well-greased baking sheet or pan. Using a spoon, fill the hollowed zucchini boats dividing the filling equally, about 1/3 cup in each, pressing firmly. Top each with shredded cheese. Bake for 20-30 minutes until cheese is melted and zucchini is cooked through.  


Tuesday, May 20, 2014

{recipe} stuffed eggplant & bell peppers

you guys! i made my first video (well, in a long time.)

i actually love making videos. i used to make videos all the time for church, for different events for my campus ministry, for weddings, for fun, etc. it's sort of my low-key hobby that i do in private because i'm embarrassed. i'm not professional at all and my videos are newby at best. i've had an itch to try making a video again since i got my dslr two years ago but never got around to it until today.

today i decided to clean out my fridge and whip up a healthy dinner (i haven't cooked in a while - we've been out all week!) i had a lot of random veggies in my fridge - including two huge bell peppers and an eggplant, and a pack of ground chicken...so naturally, i wanted to make stuffed eggplant and bell peppers! this recipe is super low-key, quick and easy to make. it's also low on carbs and pretty healthy overall. :) I served mine with a side of garlic roasted broccolini - which is my current vegetable obsessions, btw!


the recipe is below.
i hope you guys like my video! i had sooo much fun putting it together (and it only took 20 minutes or so!) I wasn't sure how to carry my camera while throwing things in the pot, stirring, etc. i had to wash my hands like, 100 times! hopefully i'll get a better at taking/making videos :)

enjoy! (and be easy on me, peeps...)


Stuffed Eggplant and Bell Peppers 
Prep time: 15 mins  Cook Time:  30 minutes
Serves 2

1 medium-sized eggplant
2 large bell peppers
1 pack of ground meat (I used chicken)
1 small onion, chopped
1 small tomato, chopped
1 handful of spinach
1/2 cup chicken stock
1/2 cup couscous
garlic powder
salt & pepper to taste
EVOO

freshly grated cheese
breadcrumbs (i used italian)

 Pre-heat oven to 400 degrees F. Cut tip of eggplant, discard. Halve eggplant lengthwise and scoop out flesh. Chop eggplant flesh and set aside.  Cut the top of bell pepper and removed stem. Remove seeds from the hollow body of bell pepper, set aside. Chop remaining portion of bell pepper after removing the stem. Chop onion and tomato into bite-sized pieces, set aside. Heat a large cast iron (or pot) and apply generous amount of EVOO. Brown ground chicken and season with garlic powder, s&p.  Add onions and saute. Add chicken stock. Add all remaining vegetables (tomato, eggplant flesh, chopped bell peppers, spinach) and stir well. Add couscous. Close lid for 5-7 minutes and allow it to steam. Coat eggplant and bell pepper with EVOO and season with s&p. Turn off heat and spoon in generous amounts of filling. Top with freshly grated cheese and breadcrumbs. Place on a greased cookie sheet and bake in oven for 10-15 minutes until eggplant/bell peppers are fork-tender. 


Wednesday, February 26, 2014

{Recipe} Galbitang • Korean Beef Short Rib Soup

The weather has been so wacky lately.  

We basically skipped winter and had beautiful California sunshine weather (80-90 degrees!!) for most of January. Rumor has it that it's going to rain tomorrow! Today was pretty cold, but the nights in our little apartment are super, super cold on these kind of days. Days like today would be so perfect with a nice bowl of hot, steamy comfort-food soup. On chilly days like today, I wish I could stay at home and be knee high in 3 layers of socks and make galbitang all day long. 

Galbitang is surprisingly easy to make, but the broth takes a long time to brew. (Gotta squeeze all that flavor out of the bones!) This soup is the kind that you can be making in the background while you're catching up with chores at home. It sits on your stove for 6-8 hours without requiring much of your attention, so you can sneak in some laundry-folding, bathroom-cleaning, pantry-organizing and netflix watching while you're prepping dinner at home. It's amazing! 

So here we go... 


The first step is to soak your short ribs. (I actually got the cheaper kind, and it didn't have as much meat on the bones - but we're on a budget so it was my only choice!) 

Soak your short ribs in for 1 hour. Change the water a few times during that hour if you need to. This little bath allows the blood to be drained and any loose bone chips to fall off.  Wash thoroughly and be sure to wash your hands in between - it gets super oily because of the fat! ;)


Drain the cold water and blanch the short ribs in a pot of boiling water. I "blanched" mine for about 20-30 minutes. This will ensure you get some more of that fat off. (Short ribs carry a lot of fat on them, so this will help you get rid of most of it.) 


This is what it looked like after the first 20 minutes. You can drain your fatty water, give your ribs a good wash and repeat the blanching sequence 1-2 more times if you want to get all crazy. I did it twice. (20-30 minutes for each sequence).


Pour out your fatty water, give your short ribs and your pot a really good rinse. Then boil your clean water one more time to make the broth. When the water is boiling - add your short ribs, radish, garlic and whole onion. (I also included a few inches of ginger for flavor). Let it come to a crazy boil, then lower your heat to a simmer and let it go it at for 6-8 hours. 

When the broth is done, pull your short ribs and radish out and set aside. Discard the onion.


Pour your broth into a large, heat-protected bowl over a strainer covered in cheesecloth. Scoop the excess oil/fat off with a spoon or a fine mesh strainer. Return the broth into a clean pot, so that you can re-heat immediately before serving.


Prepare your toppings! 

Cook your noodles in the broth and set aside when fully cooked. 


Arrange short ribs, radish and noodles in a bowl and pour a generous amount of broth. Top with egg, green onions and hot sauce (optional).


Eugene approved of this recipe and asked me to make it again!
Hopefully we can make it again next month. :)

Galbitang Recipe (Korean Beef Short Rib Soup)

Adapted from Maangchi


Ingredients:

Galbitang
1 kg (about 3 pounds) beef short ribs
1 small korean radish, peeled (also known as daikon)
1 medium size onion, peeled with ends removed
1 ginger (at least 3-4 inches), peeled
12 cups water
starch noodles (optional)
6-8 cloves of minced garlic
6 green onions, chopped
ground black pepper

Fried Egg
two egg yolks only, stirred
pinch of salt
EVOO for frying

Hot Sauce 
1/4 cup of soy sauce
2 Tbsp of sesasme oil
1 Tbsp hot pepper flakes
1 Tbsp sesame seeds
1 green onion, finely minced


Instructions
1. Soak short ribs in cold water for 1 hour, changing water 2-3 times.
2. Wash short ribs and blanch in boiling water for 20-30 minutes. Discard water and repeat if necessary.
3. Thoroughly wash blanched short ribs and wash the pot completely of any grease. Fill with 12 cups of water and bring water to a boil on HIGH heat.
4. Add short ribs, radish, onion, and ginger to boiling water. Allow the soup to come to a boil then lower heat to MED or LOW-MED until soup comes to a simmer. Allow soup to simmer for 6-8 hours.
5. Prepare toppings: Chop green onions and eggs and set aside. 
6. Remove short ribs and radish from the soup base and set aside. Remove onion/ginger and discard.
7. Pour soup over a fine mesh stainer covered in cheesecloth into a large bowl. Scoop out any oil/fat floating on the surface. 
8. Pour soup back into large, clean pot and cook the starch noodles for 10 minutes, or until fully cooked. 
9. Arrange short ribs, radish, noodles and toppings into a large bowl and pour broth over immediately before serving. Sprinkle ground black or white pepper. Add hot sauce if desired.

Serve with rice and yummy side dishes. :) 


Perfect for cold weather, I'm telling you! And your little home will smell wonderful, too!

Stay warm, everyone. :)

xoxo,
sharon


Tuesday, February 11, 2014

{Recipe} Chicken Pho

I never knew Chicken Pho existed until I came to college. (DEPRIVED!!!)

There was a small Vietnamese shop near the Starbucks I frequented - and the "50% OFF PHO" sign outside the door quickly drew the attention of my poor college self.  I had initially thought "Pho with chicken instead of steak...? GROSS!" but $3 pho was all I could afford at the time so I caved. And it was magical. It held the same rich flavor as my usual beloved pho broth but was gloriously refreshing and not too heavy. I was hooked. I went there 1-2x a week after my long nights of studying and delighted in the fact that I got to enjoy a delicious meal for only $3. You can imagine the devastation I felt when the "half-off pho" deal went away. And even more so when the Vietnamese joint closed down. SAD FACE. 

Since then, I have only found ONE other place that serves good chicken pho. It was really close to where we lived in SGV and I used to go there all the time. (This is why my nickname is "MSG queen", btw.) Pho is easily one of my favorite meals EVER. I never imagined making it myself at home until I came across this blog and this video. Of course I had to try it. It's obviously my calling! 

And you know what?
It was pretty easy!


First - we need to char our stuff. I charred my onions and sliced ginger. I also decided to roast my drumlettes a little bit too. You can char it more than this for flavor. The more the better (or so they say). 


Most pho recipes call for additional spices including cinnamon, star anise, fennel, coriander and cloves.  These spices aren't used in a lot of our dishes so I was reluctant to buy the $4 containers for each of the spices. Thankfully, I found this little guy that actually has all those spices wrapped in this filter bag. No additives included - including MSG. Yuck! I will never cook with MSG in our kitchen...

So yay for these little guys! (There are about $3-4 a box and come with two). 


Boil some water in a big stock pot with your chicken, charred onion/ginger and spice filter bag.  (I used a Cornish hen and my roasted drumlettes for mine - just cuz that's what I had in the freezer). Let it boil like crazy for 30 minutes or so, or until your chicken (or in my case, Cornish hen) is completely cooked. 


Cut and shred. Set the chicken meat aside. Return the bones into the broth and let it simmer for another 6-8 hours). Add salt and/or fish sauce to taste. 


Prepare the toppings! 


Be patient with your broth. I started late so I ended up cutting the cook time in half and my broth was a little bland. I'd say let it ride for the whole 6-8 hours. Use a strainer of some sort to remove the fat and gunk from the top.


Then pour the broth into a bowl like so. 


Scoop the rest of the fat and oil off. 


Cook your rice noodles in boiling water just for a minute or so. It was so fast I couldn't believe it!!! Fold some cooked rice noodles and arrange your toppings into a bowl. Pour hot broth over it and let it sit for a few minutes. Add some sauce. Spray some lime juice and enjoy. :) 


Might make this a weekly thing. :) 
I bought a 5-lb bag of pho noodles so we should be good.


Chicken Ph recipe
Adapted from Smitten Kitchen

Broth
2 medium yellow onions, quartered
2 1-inch thick slices of unpeeled fresh ginger
4 quarts cold water
1 cornish hen
1-2 lbs of chicken bone or chicken wings (I used drumlettes)
1 tablespoon kosher salt
Additional spices (optional): cinnamon, star anise, black cardamoms, coriander seeds, cloves
1/4 cup Asian Fish sauce, or to taste

Garnish
1-2  pounds dried rice noodles (bánh phở)
1/4 small onion, thinly sliced
1 large scallion, thinly sliced
1 pound mung bean sprouts, steamed or fresh
1/2 cup basil leaves
1/2 cup cilantro leaves
1 lime, cut into wedges
1 jalapeño, thinly sliced
Asian chili-garlic sauce

Hoisin sauce
Sriracha

Char onions and ginger in your oven (400 degrees F) until soft.  Roast chicken bones/wings/drumlettes too while you're at it. Boil water in a large stock pot. Add chicken, onion and ginger. Add spices. Allow it to come to a boil until chicken fully cooked (about 30 minutes) and remove chicken from broth. Allow to cool and shred. Return the bones back into the broth and allow it to simmer on low-medium heat for 6-8 hours. Add fish sauce and/or salt to taste.

Prepare your garnish. Chop all vegetables finely and set aside. Place dried rice noodles in a pot of boiling water for 1 minute, or until fully cooked. (It cooks fast!) Drain water and wash noodles with cool water. Shake off excess water and set cooled noodles aside. Pour broth into another bowl with a strainer to separate the cooked onions/ginger/chicken bones from the broth. Discard the bones/onions/ginger. Remove excess fat and oil from the broth.

In a bowl, arrange noodles and garnish as desired. Pour hot soup into the bowl and let it sit for a few minutes. Squeeze fresh lime juice into pho bowl and add sauce as desired. Eat immediately.

XOXO